🚀 Overview In this guide, you'll learn how to install and configure DeepSeek-R1:8B using Ollama on a Windows machine. We'll als...
🚀 Overview
In this guide, you'll learn how to install and configure DeepSeek-R1:8B using Ollama on a Windows machine. We'll also show you how to set up Open WebUI to interact with your models via a user-friendly interface.

But wait—there's more! If you're looking for automated ways to manage AI models or want to extend this setup, we’ve got two powerful tools for you:
- ModelCraft: Automate model setup and management effortlessly. GitHub Link
- LazyLLMs: Monitor and manage AI models with a Terminal UI. GitHub Link
🛠️ Prerequisites
- Windows 10/11
- Docker Desktop installed and running.
- Administrator privileges to run installation scripts.
⚙️ Step 1: Install Ollama

1️⃣ Download the Ollama installer:
Invoke-WebRequest -Uri "https://ollama.com/download/OllamaSetup.exe" -OutFile "$env:TEMP\OllamaSetup.exe"
2️⃣ Run the installer silently:
Start-Process -FilePath "$env:TEMP\OllamaSetup.exe" -ArgumentList "/silent" -Wait
3️⃣ Verify the installation:
& "C:\Program Files\Ollama\ollama.exe" --version
🐳 Step 2: Set Up Open WebUI
1️⃣ Ensure Docker is running.
2️⃣ Pull the Open WebUI Docker image:
docker pull ghcr.io/open-webui/open-webui:main
3️⃣ Run the container:
docker run -d -p 8080:8080 --name open-webui -v open-webui:/app/backend/data ghcr.io/open-webui/open-webui:main
4️⃣ Access the Web UI at http://localhost:8080.
📥 Step 3: Pull DeepSeek-R1:8B Model
Use Ollama to pull the DeepSeek-R1:8B model:
& "C:\Program Files\Ollama\ollama.exe" pull DeepSeek-R1:8B
To pull additional models like qwen2.5:7b:
& "C:\Program Files\Ollama\ollama.exe" pull qwen2.5:7b
🤖 Automate with ModelCraft

Why do all the manual work when ModelCraft can handle it for you?
⚙️ Automatic Installation & Configuration
ModelCraft simplifies the setup process with a single script:
1️⃣ Clone the ModelCraft repository:
git clone https://github.com/iscloudready/ModelCraft.git
cd ModelCraft
2️⃣ Run the PowerShell automation script:
.\lazyllms_auto_install.ps1
This script will:
- Install Ollama (if not already installed).
- Pull models like DeepSeek-R1:8B and qwen2.5:7b.
- Set up Open WebUI via Docker.
📊 Monitor Models with LazyLLMs
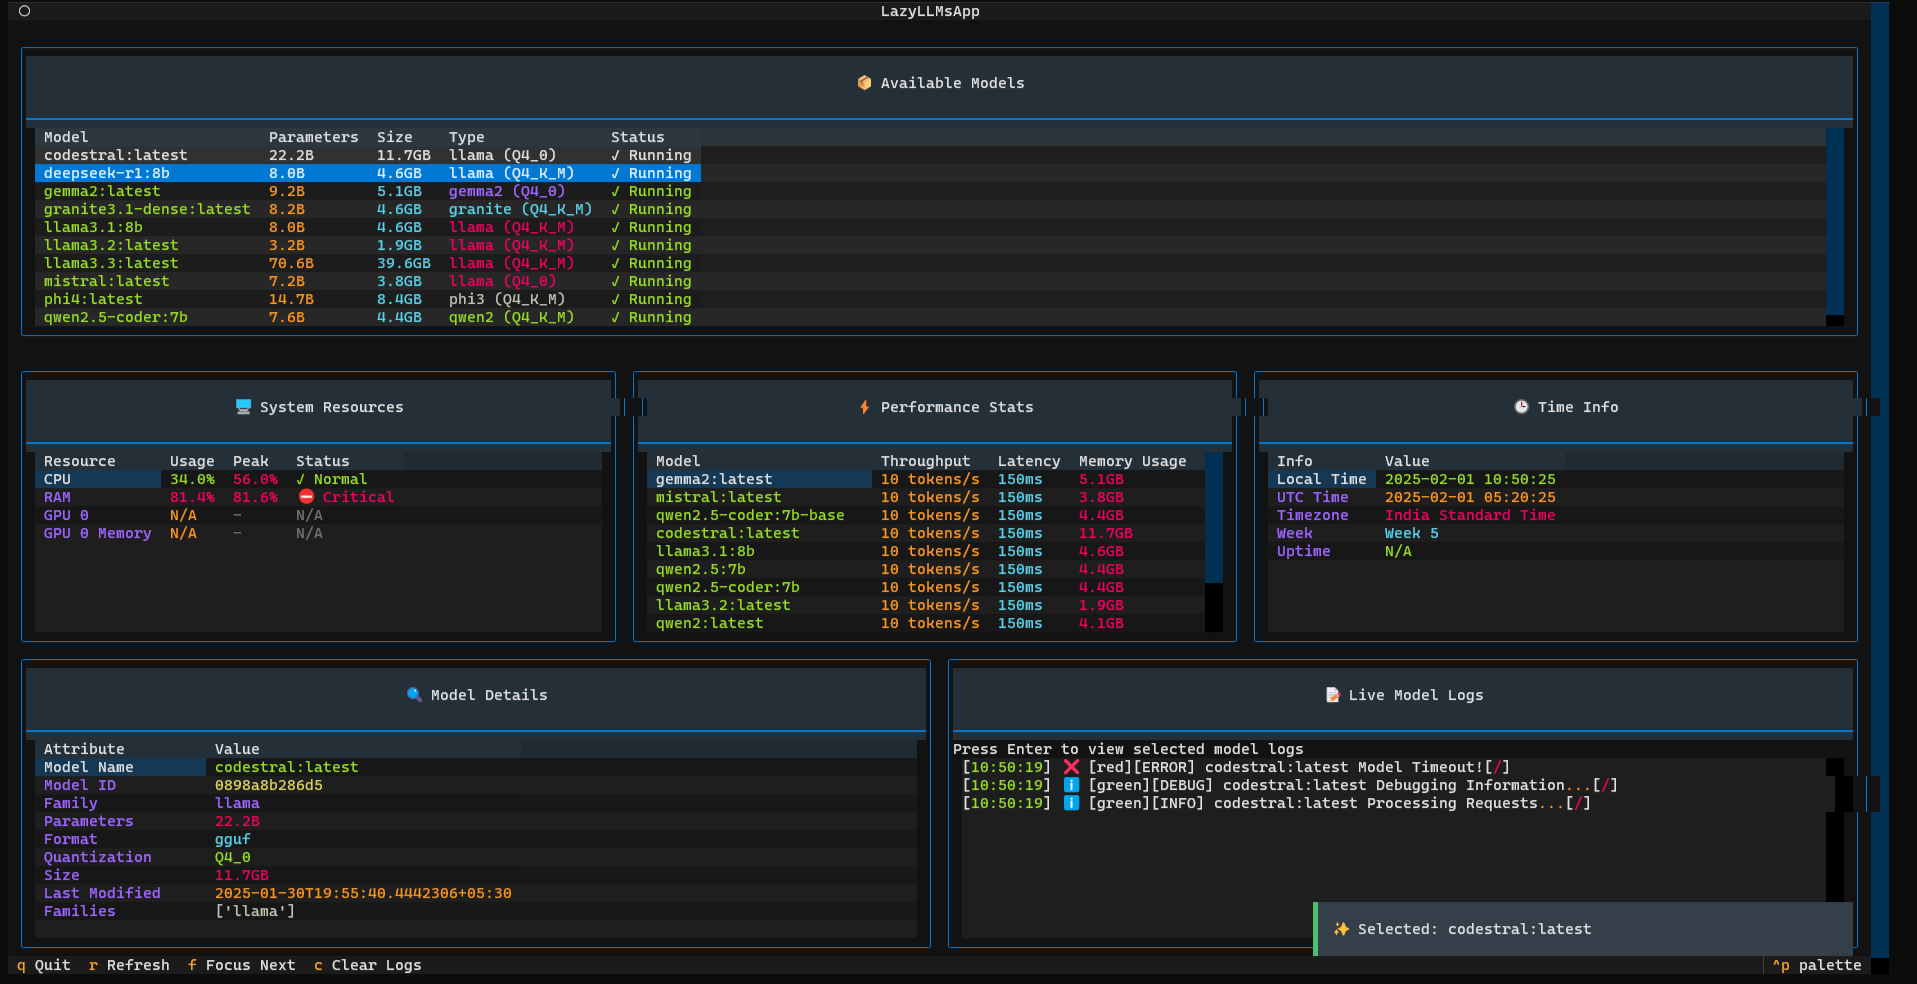
Once you've set up your models, you can manage and monitor them using LazyLLMs. This terminal UI tool provides real-time insights into model performance and system resource usage.
1️⃣ Clone the LazyLLMs repository:
git clone https://github.com/iscloudready/lazyllms.git
cd lazyllms
2️⃣ Launch the terminal UI:
python main.py tui
Key Features:
- 📊 Real-time monitoring of running models.
- 🚀 System resource tracking (CPU, RAM, GPU).
- 🔍 Start and stop models directly from the terminal.
🎉 Conclusion
You’ve successfully installed DeepSeek-R1:8B and set up a powerful Web UI for easy interaction. For advanced model management, explore ModelCraft for automation and LazyLLMs for real-time monitoring.
Happy experimenting with AI models! 🚀


ليست هناك تعليقات